Tuesday, November 22, 2011

Chocolate Brown Sugar Banana Muffins


As November is passing by faster than I can seem to keep up with, I thought it was about time for the second installment of our banana themed “flavor of the month”.  I decided to take this recipe in a sweeter direction, and make something more along the lines of a dessert. What I cooked up was chocolate chip banana muffins with a brown sugar crumble topping. They're almost cupcake-like. I gave them to my friend for his birthday, and he seemed to enjoy them, so hopefully you will too!

Ingredients 
1 1/2 cups all-purpose flour 
1 teaspoon baking soda 
1 teaspoon baking powder 
1/2 teaspoon salt 
3 over-ripe bananas, mashed  
3/4 cup white sugar 
1 egg, lightly beaten 
1/3 cup butter, melted 
2 tsp vanilla 
3/4 cup semi chocolate chips  

Brown sugar crumble topping 
1/3 cup packed brown sugar 
2 tablespoons all-purpose flour 
1 ½ tablespoon butter

Directions
-Preheat oven to 375 degrees F
-Lightly grease muffin tray, or line each compartment with muffin paper
-In a large bowl, mix together flour, baking soda, baking powder and salt. In another bowl, beat together bananas, sugar, egg and melted butter. Add chocolate chips. Stir in banana mixture into the flour mixture just until moistened. Spoon batter into prepared muffin cups.
-For the topping, in a small bowl, mix together brown sugar and flour. Cut in butter until coarsely mixed. Sprinkle topping over muffin batter in tray.
-Bake 18 to 20 minutes, or until a toothpick inserted into center of muffin comes out clean.


-Ianna

Friday, November 11, 2011

Apricot Ginger Banana Bread


I think just about every family has a recipe or two that has been handed down from grandma that takes everyone back to their childhood. Its that recipe that upon tasting it you are brought back to being a kid in the kitchen, barely able to see over the stove, licking the batter out of the bowl. For me, that recipe is banana bread. This recipe was inspired by a take on my grandma’s banana bread and one of my favorite teas, an Apricot Ginger Black Tea. Its a combination of both nostalgic memories with my grandmother as well as the spicier tastes I have grown to love. Just throw in some chewy chunks of tangy apricots, and you have an alluring twist on grandma’s specialty.

INGREDIENTS                                            ALSO                                     
3 very ripe Bananas                                     large bowl
1 cup dried Apricots, cut into chunks        medium bowl
½ cup Butter, softened                               small bowl
¾ cup Brown Sugar                                     loaf pan
¼ cup Honey
1 tsp. Vanilla Extract
½ cup Milk
2 cups All Purpose Flour                                                               
½ tsp. Baking Soda                                                                        
1 tsp. ground Cinnamon
½ tsp. ground Ginger
¼ tsp. ground Nutmeg

Preheat oven to 3500F, and grease your loaf pan. In a small bowl, smash your bananas until they are smooth; I personally like to leave it a little chunky though. In a large bowl, cream together butter and brown sugar. Add honey, bananas, milk and vanilla, mixing well.

In a medium bowl, mix together flour, baking soda, cinnamon, ginger, and nutmeg. Once this is blended together, gradually add it to the bowl of wet ingredients in thirds. After you have mixed the batter together, fold in the chunked apricot pieces. Pour the batter into your loaf pan and bake for about 1 hour. You will know its nearly done once you begin to smell ginger wafting through your kitchen.

Allow it to cool for about 10 minutes, if you can wait that long! Enjoy it with some milk or hot tea.


-H!

November: Banana Battles

Every month Love Handling Food wants to try making a few different dishes using the same key ingredient. A Flavor of the Month, you could say. This month, we've been experimenting with bananas. For the remainder of the month we will periodically post new banana-inspired recipes, and next month we'll be onto a new flavor.

-Love Handling Food

Wednesday, November 9, 2011

Winter Squash Soup


For this recipe we used Turk’s Turban Squash which we acquired from our good friend, Tom, who grew them. We used two squash, but it yielded a large amount of a very thick soup, so depending on what you like and how much you want, consider using only one squash. This variety of squash was delicious and something new to try. The flesh was a yellow-orange and green color, which smelled strongly of melon when we managed to open the tough shells.


INGREDIENTS                                                                    ALSO
1-2 Medium Squash                                                          5 quart pot
½ Yellow Onion, thinly sliced                                        2 Cold Beers :)
2-3 cloves Garlic, chopped
1 Tomato, diced
1 32 oz. carton Vegetable Stock
½ cup Plain Yogurt
4 tbsp Butter
Olive Oil
Salt, Pepper, Cayenne, Brown Sugar
Green Onions, roughly chopped
            -Makes ~4 servings

Preheat oven to 3500F. Cut your squash in half, remove seeds, and rub olive oil into it so it will be moist as it bakes. Place these open side down on a baking sheet lined with foil and allow them to bake for 20-25 minutes, or until the flesh is soft and can easily be scooped out.

While your squash are baking, prepare your sliced onions by sautéing them with garlic, butter, salt and pepper in the bottom of the pot. When the squash is out of the oven, spoon it into the pot and add the vegetable stock. Stir this together to mix well and add yogurt, cayenne and brown sugar. You will want to do lots of taste testing here! We ended up adding roughly a half teaspoon or so of each. Lastly, add a small handful of chopped green onions to top your soups, and you’re ready to eat!

We enjoyed our soup with a slice of toast and two tasty beers. Helaina had a Green Flash Red IPA and Ianna had a Napa Smith Cool Brew Hop Ale. It was an awesomely hearty and warm meal, perfect for a cold autumn evening in Santa Cruz.


-Ianna and Helaina

Tuesday, November 8, 2011

Bees on the Swarm

Credit to: CartoonStock.com.


Yesterday began as a generally mundane Friday. At a community teaching garden I volunteer at, things were going as usual: we were weeding and clearing the beds from last season to begin prepping for winter plants. As we worked, we started talking about the Occupy Wall Street Movement and how it has manifested itself in Santa Cruz. The teacher to the group was telling us about how she is involved in the General Assembly at Occupy Santa Cruz and how she feels about it all.

“It is important to make allies and connections locally” she said, because we need to be strong at a local level if we expect to be strong at a federal level. The situation we are in after all is, if not a global crisis, at the very least a national crisis. And then she said something incredibly poignant, something I think describes exactly the situation America is in:

“It’s not fair because we are all their worker bees who get to exploit us for our work. There are only a few people who get to control everything, and people are starting to notice.” She is right. We are all being treated like expendable worker bees, sustaining the mother hive and all busting our butts producing honey for the queen. 

Yes, this metaphor may be ever so incomplete, because we don’t have ONE queen. But, we do have ONE corporate body that we all refer to as “Washington.”

Credit to: RJ Matson, Roll Call, 10/6/2011
So what does this mean? To continue with the worker bee metaphor, think of it this way: stop making honey for the queen. Go rouge. Desist. The queen has all the honey she needs, and because as any surplus is not redistributed to the lower tiers of the colony, this honey is going to waste. It is being used to further fatten the queen of the hive, and only the most meager portions are being given back to the worker bees producing it. America is both the land of plenty and the land of scarce; it just depends on who you are in relation to the queen that determines where you are on this spectrum.

What are we worker bees to do? Maybe it is time to swarm. This isn't to I say condone or promote violence in anyway. Actually, even though the term swarm has a negative connotation, bees on a swarm mean no harm. Swarming bees are actually quite docile, and are just looking for a new home when the old hive becomes inadequate to accommodate their population. So, is it time to swarm? Is it time to make ourselves visible to Washington because our old way of life is no longer adequate?

The Occupy Movement is gaining global momentum, and at this part it is impossible to ignore, no matter what corporate media wants us to believe. It is widely supported because we really do live in a colony whose resources are being exploited by the insatiable greed of ultra-honey-hungry Washington. Yes, the label 1%ers and 99%ers may be gimmicky and cheesy- but in all honesty, it is true. This situation is in no way new to Americans. Remember, it was less than a century ago this nation found itself in an unstable economy that was made so way by risky business adventures by investment bankers.
Anonymus, 1929

Credit to: Chester Garde, January 1931

We worker bees have had enough. We work too hard to produce too much and are appreciated far too little. It is time to swarm. Just because regular worker bees like you and I don’t have a Lobby or Political Action Committee that is in bed financially and politically with Washington does not mean we don’t matter. It is time to show Washington how valuable we are and how powerful we are when we swarm.

SOLIDARITY!

-H. BOMB

Friday, November 4, 2011

Insta-Brownie Latte


 Sometimes, the time spent making a dish is often just as fun and enjoyable as eating it. Other times though, you might just really want something to eat right then and there! For instance, if you were craving a brownie, having one within a few minutes would be pretty fantastic. This recipe is meant to do just that!

A couple friends of ours recently just had birthdays. So, we decided to make them brownies in mugs, which is a perfect, delicious, generous, personal sized portion to wish them both a Happy Birthday. Here’s what we made for them:

Ingredients:
4 tbs butter
2 tbs water
1/4  tsp vanilla
1 pinch of salt
3 tbs sugar
3 tbs flour
2 tbs cocoa powder
2 tbs honey
3 tbs chai latte mix
¼ overripe banana
*makes 1 serving…double-up ingredients if you want to share J

Melt butter, and mix melted butter with water , vanilla, and honey
Slowly mix in sugar, cocoa powder, chai latte mix and flour
Mash in overripe banana until mixed. Batter may have some lumps. This is ok!
Grease large mug, and pour batter into it
Microwave 1:00-1:40 seconds

We personally like it slightly undercooked in the center.

Enjoy!

-Ianna and Helaina

Thursday, November 3, 2011

Worm Compost 101


Why compost?  

Compost is a great way to replace the nutrients the plants in your garden use to grow. Plants “eat” up the phosphorus, nitrogen, and other micronutrients in the soil as they grow. One of the main differences between organic and conventional farming is the attention to maintaining the health of the soil. In conventional farming, chemical fertilizers are used (at a great cost financially and environmentally) to replace nutrients in the soil. This process is very crop-focused, not giving much attention to the life contained in the soil. Organic food production, on the other hand, tends to focus on this life and seeks to maintain it health in order to yield a more nutritious crop. Think about it this way: we eat plants, and plants eat what’s in the soil. This means it is incredibly important to feed the soil! But how does one feed their soil? For mine and Ianna’s particular garden, and living situation, the simplest and most effective solution is to have a worm compost bin in the back yard. It works great; we are growing a garden, and live in a house with five other people- so we make a lot of food waste. Having the compost both feeds our garden and decreases what we contribute to the landfills.

How do I start my compost? 

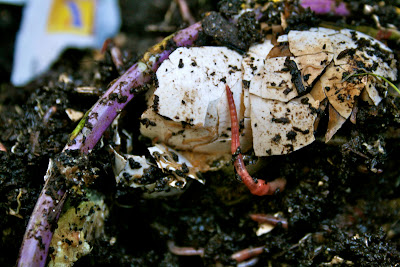
There are really only two things you need to invest in to get your own worm compost started, and if you are lucky, you might not have to financially invest at all. First, you obviously need some worms. I got mine locally from an organic farmer that I found through Craigslist. I am fortunate enough to live in a community that is very friendly to these sorts of things, so I actually didn’t have to look very hard. If you aren’t as lucky as me, you can easily find worms online for just this purpose. Sites will usually tell you that Red Wigglers are the best worm species for this type of project, which is also what I have. You also can check your local nursery to see if they know of any local sources for this. My worms cost me an investment of $25 dollars for about 10lbs of worms. Secondly, you need a bin of some sort to put your new pets in. I have a 20 gallon tub I got at the hardware store for about $17 dollars which I drilled holes in the bottom and the top of for ventilation and drainage purposes.  

Fortunately, the last ingredients for this project are things I’m sure you all have plenty of- soil, food scraps and newspapers! To begin with, you will need (in addition to the worms) soil from your yard or garden, a little sand to provide extra grit, shredded newspapers and food scraps. You will make a bed for your worms by incorporating the soil and sand, and layering the mixture in your container with the shredded paper. If you also have food scraps upon beginning, add them into the container in small pockets and bury them. When you add worms to the container, they will make their way down into the soil and begin eating your leftovers. This is because the worms are photosensitive and want to be in the dark moist soil. You will want to finish by adding another layer of newspaper on the top to shade them a bit more and retain moisture. Even if your container has a lid this is still a good idea because it provides further insulation from the sun and other elements, as well as critters you don’t want in your compost like slugs and flies.


How do I maintain my compost? 

The majority of your food scraps can be used for your compost. Fruit and vegetable scraps, egg shells, coffee grounds and teabags (with no staples) can all go into your compost. Things to avoid include grains, meat and dairy, fruit pits and large seeds, and citrus peels and flesh. You will need some sort of bucket or container to put your food scraps in for collecting, and every few days you will add your collection to your compost the same way as I describe above: make small pockets, add food scraps, bury. From time to time you may want to add a bit more water and sand; the consistency you want to maintain will be something like moist and slightly gritty. Adding more newspaper scraps on occasion also never hurts. Your worms will essentially take care of everything themselves, just be sure to feed them well and maintain their habitat. 

Because your compost can be ongoing project of sorts, whenever you integrate it into your garden, you don’t have to use the entirety of your compost. I usually take about one third or so of it to use, and leave the rest to continue doing it’s compost-magic. Now, remember I mentioned the worms being photo-sensitive. In order to harvest some of your compost while leaving the majority of your worms intact in their habitat, put your container in the sun. What I do is remove the lid and newspaper layer on top and expose the compost to light. This makes any worms toward the top start to wriggle down deeper into the compost. After a few minutes I take a shovel and harvest the top few inches of compost to be integrated into my soil. Here I should add your worm population will be limited by two things: the size of your container and the amount of food scraps they will receive. For this reason, I have tried to give fairly loose guidelines for the entire process, adding general tips I find work well for me. 


-H!

To learn more check out these websites I used when I was starting my worm compost: