Showing posts with label Dinner. Show all posts

Friday, November 23, 2012

Parsnip and Carrot Fries: Sweet or Savory

For a second serving of the root flavor of the month, LHF brings you a healthier alternative to those deep fried potatoes at your local fast food stop: sweet or savory parsnip and carrot fries.


Here what you'll need:
Parsnips (I only used one for myself, so the number depends on how much you want to eat)
Carrots (Again, I only used one)
Olive oil
Sea salt
Pepper
Garlic
Brown sugar
Cane sugar

I couldn't decide whether to make the fries sweet or savory, so I opted for both in two separate batches.

Begin by preheating the oven to 425 degrees. Once the parsnips and carrots are cut into long, medium-thin slices, you can coat them in olive oil. Then, lay them out on a baking sheet (you may want to cover it in tin foil to help with the clean up, since the brown sugar sticks), and sprinkle the savory fries with sea salt, pepper, and garlic. On the sweeter side, sprinkle the remaining fries with brown sugar and lightly with cane sugar (I sprinkled some extra brown sugar on the fries once they were done baking as well).

Bake for about 10-12 minutes, and enjoy your sweet and savory root delights.

-Ianna

Monday, October 29, 2012

Pumpkin Pizza

Today, we have a fun and collaborative post with fellow blogger and friend, Katy, from Eat. Live. Thrive. She helped make the latest recipe for the pumpkin flavor of the month extra delicious...and nutritious.

What we decided to make was a pizza that used a pumpkin sage sauce rather than one with a highly salty tomato base. It was a unique take on a old-time favorite. Here's what you will need:

Photo courtesy of Eat.Live.Thrive.

Ingredients:
Pizza dough (we used pre-made whole wheat dough from Trader Joe's)
Pumpkin filling (we used about 3/4 can)
Fresh sage (about 2 tbs., chopped)
Fresh rosemary
2 tsp. crushed garlic
Mushrooms (sliced and grilled)
Red onions (chopped)
Spring mix (we used Trader Joe's "Power to the Greens" mix, which has
           baby kale, chard, and spinach)
Gorgonzola cheese
Mozzarella cheese
Balsamic glaze/balsamic reduction

Instructions:
Before you prep your ingredients, make sure to leave your dough out according the package directions. It needs a little time to adjust to room temperature. While you are waiting, you can prepare your other ingredients or maybe enjoy a nice cold beer and conversation with a friend. You can also take a moment to preheat your oven to 450 degrees. :)

To make the sauce is very simple. Simply sautee the chopped sage in olive oil with 1 tsp. crushed garlic. This helps to release the sage's flavor. Once the sage has become a darker green and softer in consistency, simply stir in the sage with the pumpkin filling. That's it! 

Photo courtesy of Eat.Live.Thrive.
 The only other topping that requires a little preparation is the mushrooms. We sauteed them in olive oil and 1 tsp. crushed garlic just so they would not dry out while baking. So, once your sauce and mushrooms are ready, you can prepare your pizza dough by spreading it out, and layering it will all the yummy ingredients. As a note though, for the Gorgonzola cheese, make sure it is still cold when you put it on. This will help it to crumble and spread easily on the pizza.

At this point, you should be ready to bake your pumpkin pizza. The bake time will vary based on the dough, size, and thickness of your pizza, so just make sure to keep an eye on it. You can be pretty sure that it's ready when the cheese is lightly browned and bubbly.

I promise that the pizza is nearly as fun to make as it is to eat....but maybe I'm biased. If you want, adding a balsamic glaze or balsamic reduction (accomplished by cooking balsamic vinaigrette) to your pizza adds a tangy-ness that nicely compliments the sweet sauce. We found that Gorgonzola cheese was also the perfect addition to the pumpkin flavor. 

As Katy is studying nutritional science, I was elated when she informed me how healthy pumpkin filling is for you (not the spiced one with sugar). She also packed in the nutrition with extra greens to top the pizza. I gobbled every cheesy bite with a mouth full of baby kale, chard, and spinach, and I loved every moment of it. Of course, I quenched my thirst with a Stone Pale Ale, which might not be too healthy for my body, but I insist that it's good for my heart.


If you want some fantastic and healthy recipes and advice, or if you just want to go check out some food porn, please visit Katy's blog here! It's totally safe for work!

-Ianna


Saturday, September 29, 2012

Nuts For Fruity Pasta Salad


Uncooked pasta (I used tri-colored rotini)
1/2 Granny Smith apple
1/2 Gala apple
1/2 Bartlett pear
1 cup walnuts (chopped, to your preference)
Feta cheese
Balsamic vinaigrette

Upon having one of my weekly dinners with my friend, Sarah, I opted to get a little creative with pasta salad. In my attempt to successfully mix sweet and savory, I think this recipe turned out to be a great success. Even Sarah, who was nervous to try the dish, loved it!

It's a super simple meal that can be prepared in about 10-15 minutes, and it fits a variety of occasions. All you have to do is cook the amount of pasta that you desire, and while it is cooking, chop up the amount of apple, pear, and walnuts that you wish to toss in the pasta salad. You can use more or less than I did, because it really all about personal preference for this dish. When the pasta is done cooking, drain it and run it under cold water until it has reached a cool temperature. Then, let it drain further, and add it to a serving bowl. Toss the pasta with the chopped fruit mix, and add the crumbled feta cheese. Drizzle with balsamic vinaigrette.

If you're trying to lessen your carb intake, this dish would also taste great as an apple, pear, walnut, feta salad.

Enjoy!

-Ianna

Friday, September 28, 2012

Granny Apple Quesadilla


Flour tortillas (whatever your preference)
1 Granny Smith apple
2 medium sweet yellow onions, chopped (These will be caramelized. They cook down a lot!)
baby spinach and arugula
crumbled goat cheese
sharp white cheddar cheese
chicken breast fillet
balsamic vinaigrette
rosemary (dried or fresh)
1 tsp white sugar
1 tsp salt
olive oil
*Makes 2-3 quesadillas

Apples can put an unexpected and unique twist on a variety of savory dishes. Quesadillas are one of my go-to options if I'm wanting something to eat fast, so I thought it would be a cool idea to throw some apple in the mix when making dinner with my friend, Zara.

For the most part, this meal can be prepared fairly quickly, however, caramelizing the onions does take time (20-30 min). So, I would begin with this step. Heat your olive oil on a medium-low heat in a large skillet, and add your onions, making sure that they are coated in the oil. Then sprinkle the salt on them, as it helps them caramelize a little faster. Also, don't worry, because your onions will cook down a lot, even if it looks like there are way too many onions in the pan for a couple of quesadillas. Stir the onions occasionally. If they slightly stick to the pan, this is ok. It is all part of the browning and caramelizing process. Just be sure there is enough oil in the pan that they are not burning. After about 20 minutes, you can add sugar to heighten sweetness and aid in the caramelizing process, and by about 25-30 minutes, your onions should be done!

While your onions are cooking, you can prepare the chicken. Chopping up the chicken breast first helps it to cook quickly, just be sure not too over-cook it! Simply saute the chicken in some olive oil, balsamic vinaigrette, and rosemary until thoroughly cooked.

Now that both the onions and chicken are done, you are ready to assemble the quesadilla. I spread a thin layer of margarine on the sides of the tortillas that would be on the pan so that they would get nice and crispy. Then, I layered the crumbled goat and cheddar cheeses, caramelized onions, chicken, thin apple slices, spinach and arugula between the tortillas, and cooked the quesadilla on a medium heat for a few minutes. The trickiest part, is flipping the layers of deliciousness!

This is one of the best quesadillas I have had. I hope you can say the same if you try it!

-Ianna

Wednesday, August 29, 2012

Coconut Kheer and Vegetable Korma

Photo courtesy of Ianna Angelo.
When it comes to Indian food, what I love most about it is the focus on complex spice arrangements in every dish. Because of this, I knew that in attempting to make Indian food for the first time, I was up for a challenge. The final product turned out pretty tasty though, so of course I am sharing my spin on the traditional vegetable korma and kheer (rice pudding) with you all. Best of all, the meal features our coconut flavor of the month!

Coconut Kheer:
1 cup coconut milk
1 cup uncooked rice
1 tablespoon cardamom
1 teaspoon cinnamon
1 cup sugar
3 cups milk (but this really depends on how thick you want your pudding)
1/4 cup crushed cashews
2 cups fresh, grated dried coconut

Photo courtesy of Ianna Angelo.
Instructions:
Traditionally, this dessert is not made with coconut at all, but with coconut being the flavor of the month, I had a feeling it would pair well in this sweet and creamy dessert. Making it is actually pretty simple too:
First, mix rice, milk, and coconut milk in a large saucepan. Bring to a boil, and once it has reached a boiling point, decrease the heat to a medium-low simmer. While it simmers, add in the cardamom, cinnamon, sugar, crushed cashews, and grated, dried coconut. Simmer until the rice is tender (typically 20-25 minutes). Now, depending on how thick you like your kheer, use more or less milk. I preferred it as a thicker, pudding consistency, while many others may like it more on the thin side. Once it is cooked to your liking, serve it up, and garnish with some more grated dried coconut, and cinnamon. What is also so nice about this coconut kheer, is that it tastes good warm or chilled! You can't go wrong.

Vegetable Korma:
1 can tomato sauce
1 1/2 - 2 cups milk
2 medium potatoes, chopped
1 carrot, chopped
1 tablespoon curry powder
1/2 tsp cardamom
1 tsp cinnamon
1 tsp tarragon
1 1/2 tbs garlic
1 tsp cayenne
1 tsp cumin
  2 diced shallots
vegetable oil
1 tbs ginger
1 cup sugar
1 bell pepper

Photo courtesy of Ianna Angelo.
Instructions:
Now, the veggie korma is a little more complicated than the coconut kheer. But, it is worth all the work:
Begin by sauteing chopped potatoes in olive oil on a medium heat in a large, deep skillet. Once potatoes begin to soften slightly, add tomato sauce, and bring this mixture to a slow rolling simmer. Then add in chopped carrots, shallots, and ginger. Cook on a medium-low heat for a few minutes, and then add in the curry powder, cardamom, cinnamon, tarragon,  garlic, cayenne, and cumin. Stir well, and continue to cook for 3-5 more minutes. You are now ready to add in milk and sugar and at this point, your potatoes and carrots should be near completely cooked. As your last step, you will add the chopped bell pepper, as this will cook the fastest. Continue to simmer dish until ingredients have softened to a desired consistency. Enjoy!
The Saag Aloo that Sarah made. Photo courtesy of Ianna Angelo.
Naan, compliments of Trader Joe's. Photo courtesy of Ianna Angelo.
Finally!
Although my contributions stopped at the vegetable korma and coconut kheer, I had the pleasure of enjoying a couple other Indian dishes, courtesy of my friend Sarah, and naan, courtesy of Trader Joe's. Sarah and I had a blast cooking together, and we had an even better time eating the fruits of our labor. I look forward to making more Indian dishes in my future, because this was a very successful first try!

-Ianna

Sunday, August 19, 2012

A Healthy Stuffed Sweet Potato?!

Photo courtesy of Ianna Angelo
Upon making dinner with my friend Jennifer recently, her one request was that it be healthy. Normally, suggesting a stuffed baked potato would not fulfill her request, but we decided to prove that there is always a healthier way. What is so great, is that this meal was equally as delicious as the traditional baked potato that is slathered with butter, sour cream, chili, and cheese. Here's what you will need:

INGREDIENTS:
1 sweet potato
1-2 cups kale, chopped (remove the thickest spines because they do not get tender easily)
2 shallots, chopped
2-3 button mushrooms, sliced
1/2 cup brown cooked rice (you also can use quinoa, couscous, etc.)
1 carrot, sliced
4 cloves garlic, chopped thick
Non-fat Greek yogurt (amount really depends on your preferences)
paprika
sea salt
garlic powder (just because there is no such thing as too much garlic)
1/2 lime
fresh ground pepper
1-2 sprigs fresh rosemary
1-2 sprigs fresh thyme

Bake or microwave the sweet potato until soft. While the potato is cooking, you can prepare the stuffing ingredients, such as the rice. Using a shallow pan, cook the sliced carrots on a medium heat in a thin layer of water until they are soft. Meanwhile, in a separate pan, heat a small amount of olive oil and saute the kale, garlic, shallots, and mushrooms over a medium heat. I had to add small amounts of water to the pan while the stuffing mix cooked to allow the kale to get tender, and to prevent the ingredients from burning. According to your taste preferences, season the mix with paprika, ground pepper, sea salt, garlic powder, fresh rosemary and thyme, and freshly squeezed lime juice. Once the kale is tender, the mixture is done cooking.

Now its time to stuff the sweet potato. First, spread a layer of the non-fat Greek yogurt. Next, add some brown rice, and cover this with the veggie mix. Top this veggie mix with the sliced, cooked carrots, and then add a dollop of the non-fat Greek yogurt. Garnish the potato with more fresh rosemary and thyme.

If you want to make the side salad, simply combine spinach and thickly cut tomatoes. Sprinkle the salad with flax seeds for added fiber, and lightly toss with balsamic vinaigrette and extra virgin olive oil.

Enjoy eating your guilt-free loaded baked potato!

-Ianna


Friday, August 10, 2012

Coconut Curry Fish Fry with Coconut Lime Rice

Lately I have been on a fish fix. I have been craving sushi, salmon, tuna, and shrimp all week. Five days a week I work as a server at a crazy little seafood cafe in Pismo Beach, but this isn't exactly the seafood I want to eat on my nights off. My cafe serves basically all fried seafood, from cod to Atlantic clams and calamari, save for some grilled salmon and ahi tuna. Don't get me wrong, its all good food and I am glad to serve it, but what I have been wanting is something much fresher and with some crazy flavor and texture.

First I went to the fresh seafood market a couple of miles from my new house, where I got about a pound and a half of cod, which was the daily special for $6.99/lb. Then I went to the local grocery store like I usually do, with one or two ingredients in mind, and ended up with a super yummy fish dinner perfect for summer, and I even got to get my hands a little messy in the process. With the volume on the boom box cranked up and a frosty cold IPA popped open, I got to cookin' and broke in my new kitchen.

This recipe is a simple breaded fried fish recipe, with some spice and flavor mixed in to make it taste like a pro made it. If you have ever made fried chicken, for example, this will be easy as pie. You will simply marinate your fish while you prep your breading station. 


INGREDIENTS
Fresh fish of your choice
Lemons
Limes
Garlic, fresh or powder
Sweet Chili Sauce
Curry Spice powder
Flour
Eggs
Coconut Milk
Coconut Shavings
Olive Oil
Rice
  *To make a more flavorful rice, replace some water with coconut milk and lime juice.

ALSO
Glass baking dish
Foil
2 Bowls or Dishes
2 Additional Dishes
Tongs or Spatula

Begin by cutting your fish into pieces. I cut mine into large chunks, probably about 1 oz each. Place these in your glass baking dish. Add lemon and lime juice, garlic, sweet chili sauce, and curry spice to taste. Toss the fish well, but gently, to evenly coat. Cover with foil and leave to marinate for about 30 minutes while you begin to boil water for rice and prepare the breading station. As I suggest above, I replaced about one cup of water with coconut milk and added the juice of one lime to the rice while it cooked. I also used a double boiler and used the steam from the rice to cook some roughly chopped bok choy. YUM!

Prepare your breading station with a total of 4 bowls and/or dishes/plates. In the fist dish you will need a cup or two of flour, more garlic seasoning, and curry spice. Mix these well. In the second dish, you will need 2 eggs and about a cup of coconut milk, whisked together. In the third will be coconut shavings only. The last dish is for placing prepared breaded (or coconut-ed) fish pieces before frying them. The order you will dip and coat your fish pieces will be flour mix-egg mix-coconut shavings (dry-wet-dry). Be sure to fully coat each piece in each mix. (Helpful hint: only load the coconut plate with about a 1/4 of the bag at first because the egg drippings make the shavings stick together and not want to stick to the fish, so only use a bit of the coconut at a time so you don't gunk it up too bad from the beginning).


Heat olive oil in a pan. Cook each piece of fish for about 2-3 minutes per side, depending on how big you cut them. Turn them over as they begin to brown and smell like toasted coconut. Serve the fried fish with prepared coconut lime rice and some veggies for a delicious dinner! Enjoy!

-H.BOMB

Monday, July 30, 2012

Berry Cheesy Crescent Rolls

A seemingly fancy snack can be surprisingly simple.


A few days ago, my friend, Nikki, came over to throw back some beers, hang out, and make some food. I wanted to contribute something that was a more savory take on berries for the flavor of the month. Knowing that berry and cheese can at times compliment one another very nicely, I opted to make Berry Cheesey Crescent Rolls. 

Since I was feeling indecisive on which cheese or which types of berries to use, I decided to cook up a variety of stuffed crescent rolls comprised of strawberries, cranberries, brie, goat cheese, and some fresh herbs from my garden. It is still debatable which berry cheese combo was the best. My favorite was the strarberry, goat cheese, and thyme roll, while Nikki preferred the brie cheese and cranberry combination. I'll let you be the one to decide once you try it for yourself.

INGREDIENTS:
Pillsbury crescent roll dough
Brie cheese
Goat cheese
Strawberries (sliced, diced, or however you like 'em)
Dried cranberries
Fresh rosemary
Fresh thyme

All you have to do, is roll up each roll with a berry-cheese-herb mix of your choice, and get baking. They're quick, easy, and scrumptious.


-Ianna

Saturday, July 28, 2012

Ho'olaule'a 2012

Wahine ("women" in Hawaiian) in metallic grass skirts dancing. Photo by Ianna Angelo.
Last weekend, on July 21st we met about halfway between our hometowns in the city of Lawndale for the 2012 Ho'olaule'a. The Ho'olaule'a is a Polynesian cultural festival that is held every summer in Lawndale by the Hawaiian Inter-Club Council of Southern California. Although the festival is coordinated by this Hawaiian cultural club, many Polynesian cultures are represented at the festival, including the Philippines, Tahiti, Fiji, Guam, Tonga, and Samoa. As a very proud hapa baby (a mix of Polynesian and White European), this is a festival Helaina has attended at least every few summers or so of her entire life to reconnect with her heritage. This was the first time Ianna, and some other friends who joined us, have ever attended the festival, but it is probably a safe bet that it was not the last! It was a hot summer day in southern California, and we enjoyed lots of muic, entertainment, a bit of shopping, and of course, a great sample of some Polynesian-American cuisine!

For an early lunch-late breakfast, a few of us enjoyed some combination plates from the food vendors. Much of Polynesian (Hawaiian, Samoan, etc.) emphasizes grilled fish, barbequed pork, rice, and some roots and veggies. There is also some fusion influence of American cuisine that incorporates macaroni and potato salads, cole slaw, and even barbequed chicken.  

Grilled Ahi Tuna marinated with garlic, served with sticky rice and soy sauce. Photo by Ianna Angelo.
Super tender barbequed Kahlua marinated pork, served with sticky rice, cabbage salad, and mandarin orange slices. One of Helaina's childhood favorites! Photo by Ianna Angelo.
There were an array of beautiful plants for sale at the Ho'olaule'a. Photo by Ianna Angelo
As the day grew hotter, we cooled off with some fresh tropical fruit. Besides the mango and pineapple pictured here, there were also offerings of coconuts, coconut waters, orange-pineapple drinks, pineapple lemonades, and many other choices as well.

The LHF ladies enjoying some fresh mango and salted pineapple, trying to stay cool on a hot summer day. Photo by Ianna Angelo/Sarah McCutcheon.
Flowers for sale at the Ho'olaulea'a. Photo by Ianna Angelo.
More wahine doing a traditional Hawaiian hula. Photo by Ianna Angelo.
Kane ("men" in Hawaiian) doing a more aggressive dance with coordinated stomping, clapping, and hitting. Photo by Ianna Angelo.
Ianna wanted to take all the flowers home with her. Photo by Ianna Angelo.
As the afternoon went on, instead of shelling out extra cash for large combination plates, we opted for different snack type foods so we could both sample some more options as well as stretch our cash a little further. Ianna got a Hawaiian shaved ice, which is best explained as ice shavings in a cup flavored with colorful sugar syrups that come in an array of flavors such as cotton candy, lime, strawberry, apple, watermelon, raspberry, pineapple, and many more! Helaina went for something a little more savory that is presumably only available at these sorts of Polynesian events or restaurants. She went for a manapua, a steamed bun stuffed with sweet tender barbequed pork....another treat taking her back to child hood memories of summer. 

Miss Ianna enjoying a rainbow Hawaiian Shaved Ice. Photo by Sarah McCutcheon/Ianna Angelo.
Helaina with a manapua and Ianna with her shaved ice. Photo by Sarah McCutcheon/Ianna Angelo.

-H

Friday, July 27, 2012

Rakott Töt


This dish was one of my favorites in Hungary. Although I'm not exactly sure what the name translates into, from what I understand, rakott indicates some sort of baked layered sausage casserole, which is exactly what this dish is! Consisting mostly of rice, squash, cheese, and sausage, this a really simple dish that delivers big flavor with just a few ingredients. As far as spices go, a generous amount of dill, some salt and pepper, and in true Hungarian fashion, a dusting of paprika for a bit of spice and color, do just the trick. When I tried it for the first time at a market with Ianna in Budapest, I immediately grabbed my notebook and scribbled down a list of what I thought I was tasting. And it turned out fantastic! Although I took a wild guess on what cheeses to use in my version, my feeling is that whatever your favorite cheese or cheeses are (or whatever looks good at the store) will work great and give you a dinner you will love! 


INGREDIENTS

2- 2 1/2 C. White Rice
Sausage
2 Small Yellow Summer Squash
2 C. Havarti Cheese, grated 
1/3 C. Soft Goat Cheese
2-3 cloves of Garlic, chopped
Dill weed
Paprika
Lemon Juice
Salt & Pepper
Olive Oil

ALSO
aluminum foil
glass baking dish

Begin by boiling water for rice to cook in. While the rice is cooking away, prepare the sausage and squash by slicing them and frying them together in a pan with olive oil, chopped garlic, salt and pepper, and a little bit of dill weed. Although neither has to cook 100 percent through since everything will continue to bake, it is important to make sure the sausage is mostly cooked in the pan, so it doesn't have too much further to go in the oven. As your stove simmers away cooking rice, sausage, and squash, grate the Havarti cheese, or whatever hard cheese you may be using.

Preheat your oven to 425 degrees. Towards the end of your rice being done cooking, squeeze in the juice of one lemon, and stir in about a tablespoon of dill. As everything finishes cooking on the stove, turn off the flames. 

Drizzle some olive oil into your baking dish. Scoop in your cooked lemon-dill rice and spread it evenly in the dish. Then add a layer of half of your grated cheese. On top of this layer the garlic squash and sausage mix. Add to this the other half of your grated cheese. Fill in the holes with some chunks of goat cheese that will add a pungent earthiness to the dish. Top it all off with a bit more dill and a dusting of paprika. Cover with foil, and bake for 20-25 minutes, allowing to cool 5-10.

You will begin to smell aromas of dill, lemon, garlic, goat cheese, and paprika as your casserole continues to bake. When you pull it out, I promise, you are going to have a hard time waiting for it to cool to eat it! Probably an appropriate moment to pop open a nice bottle of a tart dry white wine, or nice refreshing floral Hefeweizen. It will be a hard decision. But by the time you get past that obstacle, the steaming hot Rakott Töt will be just cool enough to enjoy.... So enjoy it!

-H.BOMB


Tuesday, June 12, 2012

Lemon Rasta Shrimp


Every summer I make a to do list for myself, and this year one of my challenges for myself is to cook as often as possible for people I love. So, for my first attempt at some lemon inspired eats, I decided to make a shrimp and rice dinner for my two new roommates who have allowed me to move into their small apartment. To show some appreciation and love, I cooked  my two friends a spin on a dish that another friend prepared for myself and others just a few months ago for "family dinner night". This dinner features some tangy shrimp marinated in lemon, lime, and spices, with some rasta inspired multi colored veggies, all served with some fragrant jasmine rice. I got my shrimp from the seafood section at my local grocery store, although there was no one I could find to inquire as to the source of it...maybe next week though! Since I used precooked shrimp, the process was a bit streamlined, so take note of that if you plan to use fresh or frozen shrimp. On the bright side of things, I got all my lemons for free from a kind neighbor who has more lemons than he or I know what to do with.

Because the shrimp have to marinate and absorb all the lemony goodness, leave yourself at least one hour for preparation.

INGREDIENTS

1/2-1/3 lb. cooked baby shrimp (depending on how many you want to feed, about 1/2 lb was good for me and two others)
2-3 large lemons
5-6 limes
3-4 cloves of garlic, diced
salt & pepper
1-2 tbsp olive oil
1 large red bell pepper, sliced
1/2 yellow onion, sliced
yellow cherry tomatoes
small bunch of green onions, chopped
jasmine rice (or your favorite rice), prepared to package instructions

YOU ALSO NEED
glass baking dish
foil
pot for rice

Begin by rinsing off the cooked shrimp, and putting them in your clean baking dish. Squeeze the juice from at least 2 lemons and 4-5 limes over the shrimp, depending on your tastes (we will use the rest at the end when its finished for garnishing). Add the diced garlic, and salt and pepper to taste. Cover with a small sheet of aluminum foil, and forget about in the fridge for about 30 minutes while you prep the veggies and rice. 

Prepare the jasmine rice according to the package directions, usually about a 1:2 ratio of rice:water for about 30-40 minutes. Slice up the bell pepper and onions which will bake with the shrimp, and preheat your oven to 425 degrees. Once 30 minutes or so has passed, take the shrimp dish out of the refrigerator and throw in your sliced veggies. Recover with the foil and bake for about 20-25 minutes. Because we use precooked for this recipe, only the veggies need to steam cook in the lemon mixture, but if you decide to use fresh or frozen shrimp you will need to adjust your cooking times. 

After baking the shrimp and veggies together, remove from oven. This will probably be around when your rice is done as well, so check on that too. Garnish the shrimp and veggie dish with some colorful yellow cherry tomatoes, chopped green onions, and any extra lemon and lime wedges left over. I served the rice up in colorful bowls with the shrimp and veggie mix piled on top, topped with wedges of lemon and lime for some extra TANG.


This was a light citrus inspired dinner perfect for a relaxing summer evening with friends. Even though I had originally only planned to prepare for three, we actually had enough for one extra meal, which was delivered hot, via bicycle to a friend working hard around the corner in time for his dinner break. In my double challenge for myself not only to just cook with lemon, but also to intentionally cook yummy for others, I think I came out in the end accomplished. Three times over, even!

-H. BOMB


Monday, February 13, 2012

Stuffed Salmon with Cheesy Rosemary Biscuits and HOME GROWN Kale


This month we have been having lots of fun trying to get a handle on rosemary. It is a very simple ingredient that adds a lot of dimension to your dishes. For this dinner, we added some  fresh rosemary on top of baked salmon, and baked it into some cheesy biscuits to go on the side. We picked the rosemary and the kale for our side dishes fresh from our garden, and enjoyed it all with some home brew IPA made by Helaina and our good friend Devin. 

We tried to keep as many of our ingredients as local as possible, but this unfortunately did not apply to the salmon. We used farmed salmon from the Atlantic; and although we are just beginning to learn about and understand the politics of fish, we encourage all of our followers to send us any helpful links to consider the next time we make this recipe! Food should be an open dialogue- help us to help you!


Stuffed Salmon Ingredients:
1 lb Salmon filet (we bought two ½ lb filets)
1 box of stuffing mix
Paprika
A sprig of fresh rosemary
Fresh lemon slices
 Marinade Ingredients:
1 cup olive oil
2 – 3 cloves of garlic (we also sprinkled a little extra garlic powder)
½ cup chopped fresh parsley
¾ cup lemon juice
½ tbs. pepper
½ tbs. salt (we used sea salt)

-Pre-heat oven to 350 degrees F.
-First, you have to get your salmon marinating. Mix all of the ingredients for this in a glass baking dish. Then, place your filet (or filets) in the dish, making sure to coat evenly. Let this dish sit marinating in the fridge for about an hour, flipping maybe once or twice. It is important not to marinade for too long, just because the acid from the lemon will literally begin to cook your salmon.
-Make stuffing as the box instructs.
-Once salmon is done marinating, give it another good coating flip, and make a shallow slice down the center of the filet, and some shallow slices across as well. Take the stuffing, and place it into the slices you have made in the filet.
-Sprinkle some paprika and rosemary on top of the now stuffed filet, and cover with foil. Place in oven. Bake for about 30-35 minutes, or until salmon is easily flaked with a fork.
-Serve with lemon slices.


Cheesy Rosemary Biscuits Ingredients:
2 ½ cups all-purpose flour
1 tbs. baking powder
½ tsp. salt
½ tsp. sugar
¾ cup milk
½ cup butter (softened)
½ cup grated cheddar cheese (but, there’s no such thing as too much cheese)
2 tbs. chopped fresh rosemary
*Makes about 12 biscuits

-If making separate from the salmon, pre-heat oven to 450 degrees F and bake 10-15 minutes, or until biscuits are slightly browning on the top. If making with the salmon, these biscuits can be baked at 350 degrees F for the length that the salmon takes.
-In a mixing bowl, combine flour, baking powder, salt, and sugar.
-Mix in butter, and then milk. You want the consistency to be like that of soft dough.
-Add grated cheddar cheese, and rosemary to the dough
-On a baking sheet, roll medium sized balls of dough in flour to prevent sticking.
-Bake for the length of time instructed above 


Sautéed Kale, Spinach and Onion
Like we said above, we are proud of this side dish because the Dwarf Siberian Kale we used, which does well in colder environments, was homegrown, planted back in October. The feeling of finally being able to harvest and enjoy something we had planted ourselves is matched by no purchase from a supermarket chain, or even from a local farmers market. We encourage anyone with even a small space for gardening to go for it and get planting so that you all can feel the same satisfaction!

Generous portion of fresh kale
Generous portion of fresh baby spinach
¼ onion (chopped in rings)
Olive oil
Dash of salt or seasoning of choice

-Heat some olive oil in a pan on a medium heat, and add cut onion rings and kale and cover. As greens cook down, add spinach and re-cover. Continue cooking until onions are caramelized and greens are cooked to preference. 


Wednesday, February 8, 2012

Rosemary Mac'n'Cheese Paired with Stuffed Mushrooms...these recipes can't be missed!

To kick off our new Rosemary "Flavor of the Month" for February, we have a delicious spin on baked macaroni and cheese and stuffed portobello mushrooms. These recipes are so delicious, you will go back for seconds...and thirds...and fourths...well, you get the idea:


Helaina's Rosemary Mac Attack:
Macaroni and cheese is one of my absolute favorite dinners. You can take me to any sit-down restaurant, and if I see baked mac and cheese on the menu, done deal. I'll always try a new take on this comfort food classic. It takes me back to the delicious days being a little kid, but now with a more grown up taste of rosemary and sun dried tomatoes. 

Ingredients:                                                                                                                       Also:
12 oz. pasta- while the classic uses elbow macaroni, i used spirals            11x7 glass pan
2 c. cheddar, shredded
1 c. smoked gouda, shredded
1 tbsp. fresh rosemary, finely chopped
4 tbsp. sun dried tomatoes, coarsely chopped
2 tsp. black pepper
1/2 c. milk
6 tbsp. butter
2 tbsp. flour
1/3 c. bread crumbs
      *Prepared dish makes 6 large portions
Begin by preheating your oven to 325o F and your grease pan. Cook pasta al dente, about 7 minutes.
While pasta cooks melt butter with milk, and add flour 1 tbsp. at a time. Add most of the two kinds of shredded cheese, but leave a little to sprinkle on top.  Stir in rosemary, tomatoes, and pepper. Once the cheese is melted and evenly coating the pasta, pour the mixture into your greased pan. Sprinkle bread crumbs and remaining cheese on top and bake for about 25-30 minutes. 
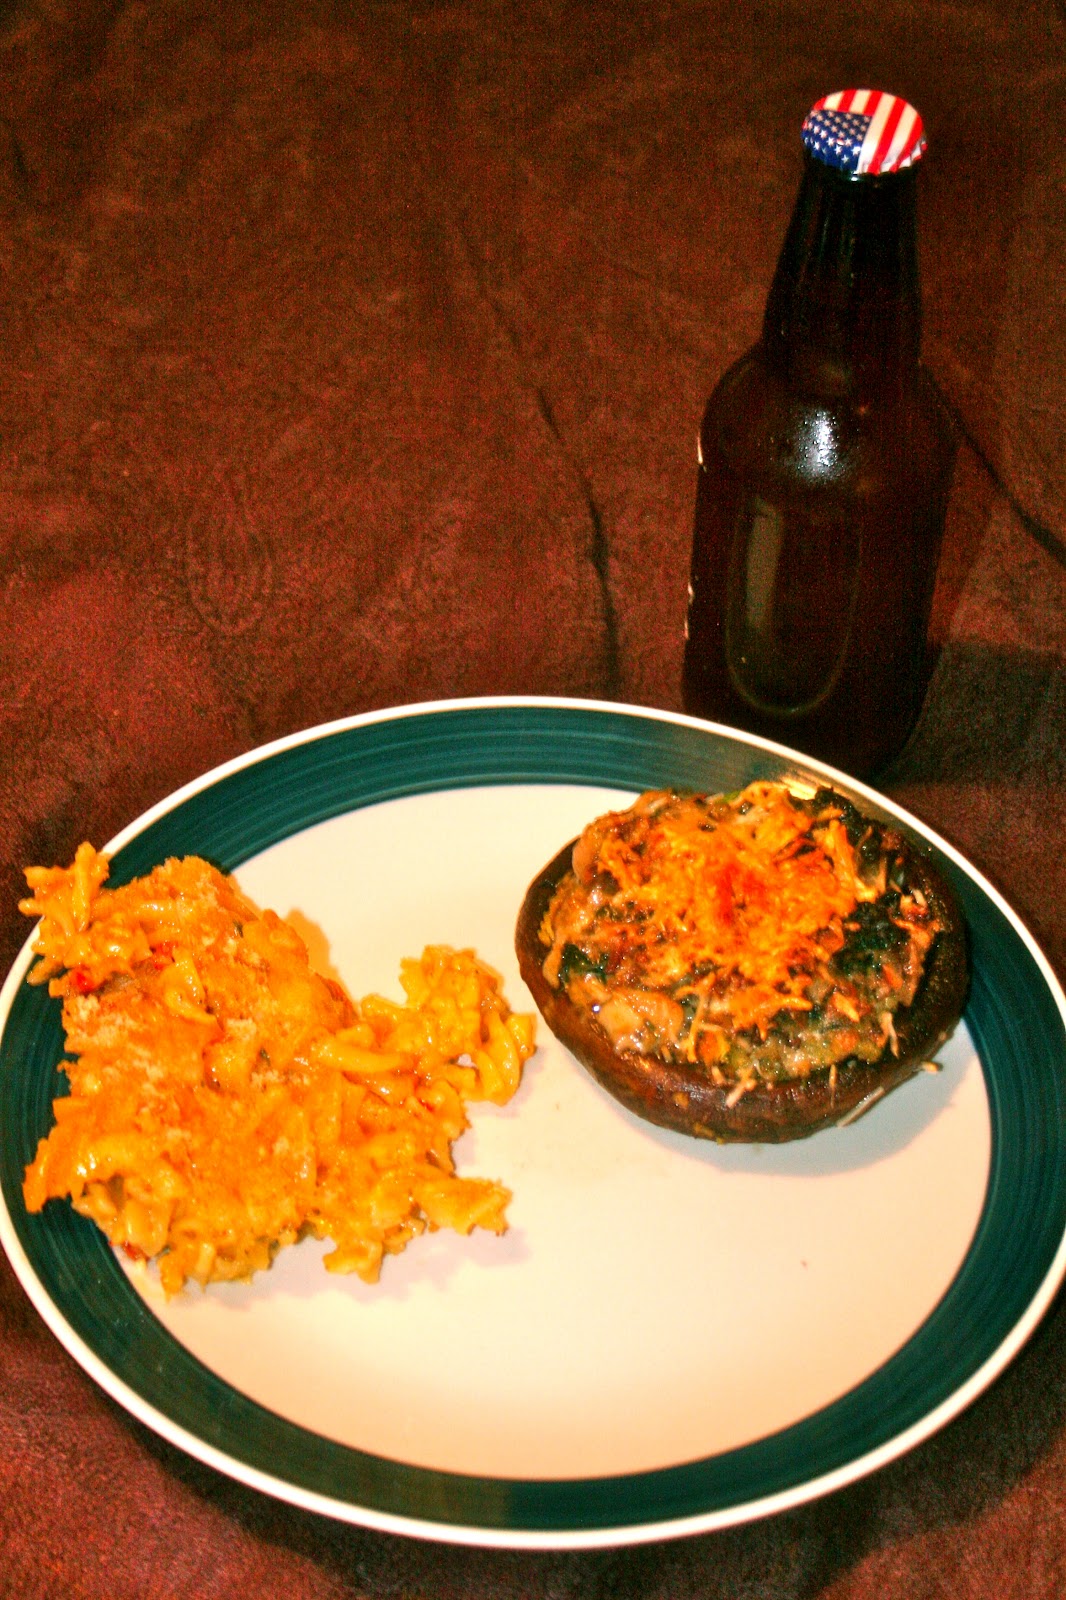
Remove from oven and allow to cool for about 10 minutes. Be sure to enjoy a healthy serving of this rosemary mac with a baked mushroom and a cold beer!


Ianna's Stuffed Portobello Mushrooms:
Maybe going to the Santa Cruz Fungus Fair did this to me, but this winter I have been obsessed with stuffed portobello mushrooms. I have made this recipe a variety a ways, with a variety of stuffing types, and it was not until a friend requested it that I decided to blog a recipe. It's pretty simple to make too:

Ingredients:
2 Portobello Mushrooms (of decent size...the bigger the better I say!)
1 box stuffing mix (I use just plain old box stuffing)
A couple handfuls of chopped, fresh spinach
Bacon (I do a a couple strips per 'shroom, but I will leave it up to you)
A few large garlic cloves
1 cup grated Parmesan cheese
1/2 cup heavy cream
Butter (1/4 cup...Plus whatever your stuffing calls for)
Salt, Pepper, and honestly whatever spices you tend to like
 *Serves two...unless you share :)

-First, remove stems from mushroom caps, then sauté caps for about a minute or so in butter. I give them some time on both sides.You want them to soften a bit, but not so much that they are falling apart and juicing everywhere. While your caps cook, chop up the stems and garlic cloves.
-When your mushrooms are done, remove them and place them on a baking sheet, with the gills facing up.
-You might need to add some more butter or oil to the pan, and once you do, add the chopped stems and garlic. Let this cook for about a minute, and then add the heavy cream. Let this cook until the cream thickens a bit, and then add the grated Parmesan. Once the cheese is melted, you can add in your spinach, since this has a low cook time. I recommend covering the pan so the spinach cooks faster and more evenly from the steam.
-While your fillings cook, fry up your bacon. Once cooked, cut into smaller pieces and mix in with the spinach filling. Remove from heat.
-Place a layer of the stuffing in each mushroom, and then another layer from your spinach-bacon-cheesy-creamy goodness. Sprinkle some Parmesan cheese on top, and then place the baking sheet into the oven on the Hi-broil setting. Leave the stuffed mushrooms in the oven until the cheese is beginning to slightly brown on top.


Enjoy! I'm telling you, you will want to make these again and again...and again. Play around with ingredients too. Every time I make them I try something new, yet equally delicious.

Also! To complete our meal, we quenched our thirsts with the home brew talents of our friend, David, who provided us with some of his hoppy and flavorful Kirkwood Steamers. It's always nice to wash down a good meal with a good beer, especially if its made with love from an old friend. Thanks David!


-Helaina and Ianna